How to Install KeTCindy
2023-07-14
-
Download the Source Code
Go to the KeTCindy GitHub Page and choose the latest version from 'Releases'.
Alternative: Go to CTAN/ketcindy and select 'Repository' (not 'Download').
- Download the Source Code (zip) in 'Assets'.
- File
ketcindy-xxx.zip (where xxx is the version number) will be downloaded.
-
Unzip and Setup
Unzip
ketcindy-xxx.zip and follow the steps for your OS:
- For Windows:
- Move the unzipped folder into
C:\.
- Rename the folder to remove the version number (e.g., change
ketcindy-4.3.2 to ketcindy).
- For Mac:
- Locate
ketcindy-xxx/doc/ketcindysettings.cdy.
- Open it with Cinderella.
-
Configuration with ketcindysettings
Double click
ketcindysettings.cdy inside the folder.
(Widen the Cinderella window if necessary to see all buttons.)
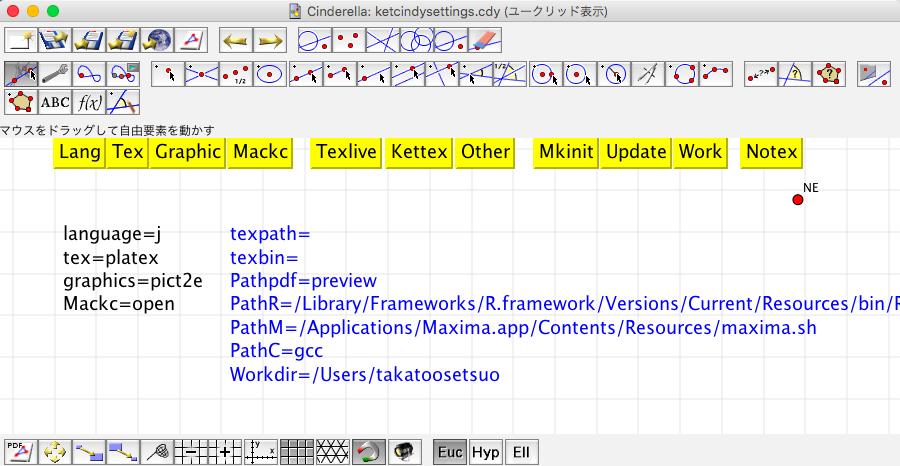
- Left Side (Yellow Buttons):
- Lang: Select Language (J for Japanese or E for English).
- TeX: Select TeX processing system (platex, xelatex, pdflatex).
- Graphic: Select Graphic code system (tpic, pict2e, Tikz).
- Middle (Yellow Buttons):
- Select TeX distribution (TeXLive, KeTTeX).
- Right Side (Yellow Buttons):
- Mkinit: Writes initialization commands to
ketcindy.ini in the User home directory.
- Update: Updates KeTCindy within TeX (Admin rights required).
- Work: Creates a 'work' folder in the User home directory.
-
Test Run
- Quit Cinderella.
- Go to the newly created
work directory and open the templates folder.
- Double click on any file to open it.
- Press the 'Figure' button on the screen. If the figure is displayed, the installation is successful.